


How to Sew a Button: Complete Step-by-Step Guide
Imagine this: you’re in a hurry to get dressed for an important meeting when you realize that your favorite dress shirt is missing a button. The cloth gaps in a strange way, making the shirt impossible to wear. You have a decision that is frustrating: wear something different that makes you less confident, or skip your appointment completely while looking for a tailor.
This happens in many homes every day, and it makes people feel helpless about something as basic as a button that is missing. A lot of adults don’t know how to sew because they think of it as an old-fashioned craft instead of a useful life skill that can save time and money.
Honestly, one of the best things you can learn in a short amount of time is how to sew a button. This basic skill can save your favorite garments, save you money on dry cleaning, and give you the confidence to deal with minor clothing problems on your own.
This complete tutorial will teach you everything you need to know about sewing buttons, from choosing the correct materials to learning how to connect different sorts of buttons in different ways. You’ll discover professional recommendations that will keep your buttons safe for years, how to fix frequent problems, and time-saving shortcuts that will make the process quick and easy. You’ll never feel helpless again when you have to fix a button by the end.

Essential Tools and Materials for Button Sewing
If you get the correct supplies before you start sewing buttons, your job will go smoothly and appear professional. Fortunately, you only need a few basic things to attach buttons, and most people already have them or can simply get them.
Thread Selection and Quality
If you can’t find an exact match, pick a thread that is as near to the color of your clothing as possible. If you can’t find an exact match, pick a thread that is a little darker instead of lighter. Cheap thread may break under stress, while high-quality thread like cotton or polyester mixes lasts longer. Navy or black thread works well with most dark textiles, and cream or beige thread works well with most light-colored clothes.
Needle Types and Sizes
For most button sewing jobs, a regular sharp needle of size 70/10 or 80/12 works great. These needles are strong enough to go through several layers of fabric and thin enough to fit through button holes effortlessly. Don’t use needles that are dull or curved since they can catch on cloth fibers and make stitches that aren’t even.
Button Selection and Compatibility
When you change buttons, try to keep the size, weight, and style the same as the original so that the garment looks and works the way it was meant to. You can get buttons from old clothes or buy sets at fabric stores. When choosing thread, think about how thick the button is and how big the hole is. Thicker buttons with bigger holes may need thread that is a little heavier.
Additional Helpful Supplies
For clean cuts, have small scissors or thread snips close by. If you have to push the needle through thick fabrics a lot, you might want to use a thimble. When you need to replace broken buttons, a seam ripper can help you get rid of old threads without leaving any behind.
Essential Supply Checklist:
- Matching thread in appropriate weight
- Sharp needle in size 70/10 or 80/12
- Replacement button matching original specifications
- Small scissors for clean thread cutting
- Optional: thimble for finger protection
Understanding Different Button Types and Attachment Methods
There are several sorts of buttons that need to be attached in somewhat different ways. Knowing these differences will help you pick the safest and best way to connect the buttons to your individual clothing.
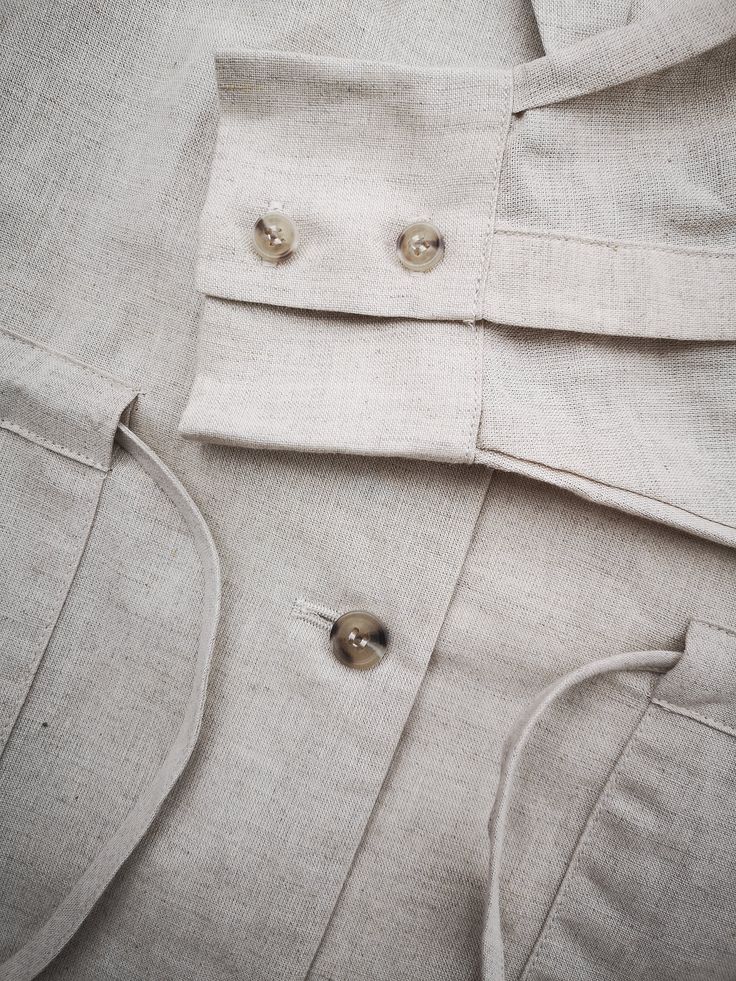
Flat Buttons with Two or Four Holes
The most popular type of button has a flat design with two or four holes in different patterns. Two-hole buttons require simple parallel threading, while four-hole buttons offer options for creating different stitch patterns—parallel lines, cross patterns, or square formations. The design you choose influences both how it looks and how safe it is. Cross patterns usually provide the strongest hold.
Shank Buttons and Their Advantages
The rear of shank buttons has a loop or stem instead of holes through the face. This makes them great for thick fabrics or when you want the button to stand out from the fabric. These buttons need a different way to be attached, but they often make for stronger connections for clothes that get a lot of wear, such coats and jackets.
Specialty Buttons and Unique Challenges
Decorative buttons, covered buttons, and vintage styles may need particular things like extra backing, certain types of thread, or other ways to attach them. Knowing how your button is made can help you pick the best way to sew it.
Fabric Weight Considerations
Silk and cotton are examples of lightweight fabrics that need to be handled carefully. To keep them from breaking, you might want to use interfacing behind the button location. Denim and wool are heavy textiles that can sustain more forceful stitching. They may need stronger thread and more passes to be safe.
TL;DR: Match your sewing technique to your button type—flat buttons need hole threading, shank buttons attach through their loop, and fabric weight determines thread strength and stitch intensity.
Step-by-Step Guide: How to Sew a Button with Holes
Learning how to sew flat buttons is the first step to learning how to sew any other kind of button. This approach works for buttons with two holes and buttons with four holes, albeit the stitching pattern may be slightly different.
Step 1: Prepare Your Materials and Workspace
Cut around 18 inches of thread. Longer sections tend to become tangled up, while shorter ones need to be threaded over and again. Make sure the knot at the end of the thread is big enough to keep it from going through the fabric but not so big that it makes it bulky.
Step 2: Position the Button Correctly
Using the existing thread marks or buttonhole as a guide, put the button in the right place. When putting a new button in, make sure you measure carefully so that it lines up with the other buttons on the clothing. While you start stitching, hold the button firmly in place.
Step 3: Create the First Anchor Stitch
From the wrong side of the fabric, push the needle up through one of the button holes. Make sure your knot catches on the fabric’s underside by pulling the thread all the way through. This first stitch holds your thread in place.
Step 4: Establish Your Stitching Pattern
To make parallel stitches with two-hole buttons, thread the needle through the second hole and back up through the first. You can make parallel lines, an X pattern, or a square shape with four-hole buttons. Keep the tension the same to keep the stitches equal.
Step 5: Build Thread Strength with Multiple Passes
Depending on how you plan to utilize the button and how heavy the cloth is, repeat the stitch pattern you picked 4 to 6 times. Buttons on coats that get a lot of use need more passes for security, while buttons on lighter clothes that are just for looks need fewer.
Step 6: Create a Thread Shank for Proper Function
Wrap the thread around the stitches between the button and the cloth a few times to make a short “shank” that lets the button work correctly when the garment is buttoned. This keeps the fabric from bunching up and makes sure everything works smoothly.
Step 7: Secure and Finish the Attachment
To lock the thread, pass the needle through the wrong side of the fabric and make a few short stitches in the same place. For a tidy finish, cut off any extra thread that is close to the fabric.
Advanced Techniques for Professional-Looking Button Attachment
These advanced procedures can enable you get results that are as good as those of a professional tailor, while also making sure that your buttons last as long as possible and look great.
Creating Reinforcement for Heavy-Use Buttons
Put a little flat button or piece of interfacing on the wrong side of the fabric to make buttons that get a lot of stress, such the ones on coats, jeans, or work shirts, even stronger. Sew through both the primary button and the reinforcement at the same time. This spreads the stress over a broader region and stops the fabric from tearing.
Mastering the Perfect Thread Shank
The thickness of the thread shank should be the same as the weight of the fabric and the purpose of the garment. Lightweight textiles just need a few shanks (2–3 thread wraps), while heavy materials need a lot of shanks (6–8 wraps) to fit the thickness of the fabric when buttoned. While wrapping, use a toothpick or thick needle to keep the thickness of the shank the same.
Professional Finishing Techniques
Instead of just tying knots on the wrong side of the cloth, make a more secure finish by creating a few little stitches through the back layer of the fabric. Then, before cutting, run the needle under these stitches. This method keeps knots from coming undone over time and makes the result look flatter and more professional.
Color Matching and Thread Selection Strategies
If you can’t find thread that matches the color exactly, you may use clear or see-through thread for buttons on patterned fabrics, or you could use thread that is a different color on purpose as a design feature. Invest in cotton or polyester mixes from well-known brands. High-quality thread makes a big difference in both how it looks and how long it lasts.
Creating Custom Button Spacing and Alignment
Make a paper template or use measurement tools to make sure that the spacing and alignment are always the same on clothes with more than one button. Before you start sewing, use chalk or removable fabric markers to lightly outline where the buttons will go.
Advanced Professional Tips:
- Use reinforcement backing for high-stress applications
- Match thread shank thickness to fabric weight
- Create secure finishing stitches rather than simple knots
- Consider transparent thread for patterned fabrics
- Measure and mark multiple button positions for consistency
Troubleshooting Common Button Sewing Problems
Even expert sewers have trouble putting on buttons, but knowing what difficulties are prevalent and how to fix them will help you avoid irritation and get the job done right every time.
Thread Breaking During Sewing
If your thread breaks, it could be because the thread is bad, the needle is dull, or you are pulling too hard when sewing. Use better thread instead of cheap thread, a new sharp needle, and don’t pull too hard while sewing. If you have to use thick thread on heavy fabrics, think about using a bigger needle to fit the thread’s bulk.
Button Sits Too Tightly or Too Loosely
Buttons don’t work right when the shank is made wrong. Buttons that are too tight and don’t have enough shanks make it hard to button up and put stress on both the button and the cloth. When buttons are too loose and have too long of shanks, they leave gaps when they are secured. Use a toothpick or matchstick as a spacer while sewing to practice making uniform shanks.
Uneven or Sloppy-Looking Stitches
Unprofessional looks come from uneven thread tension and bad stitch positioning. Keep a consistent, moderate amount of stress on the fabric while you sew, and take your time to carefully place each stitch. Plan out your stitch pattern ahead of time and make sure the spacing is always the same if you’re dealing with four-hole buttons.
Button Becomes Loose Quickly After Attachment
Buttons break too soon because of poor stitching, bad thread quality, or bad finishing methods. Make sure you go through the button holes at least four to six times (more for regular use), use good thread, and finish with secure locking stitches instead of simple knots.
Difficulty Threading Needle or Managing Thread
Use clean scissors to cut the thread at a sharp angle so that the end is pointed and easy to thread. If the thread keeps fraying, you can either moisten the end a little or use a needle threader. To make slippery threads easier to work with, run them lightly over beeswax or thread conditioner.
Quick Problem-Solving Checklist:
- Replace dull needles and poor-quality thread
- Use consistent, moderate tension while stitching
- Create appropriate shank thickness for fabric weight
- Make sufficient passes for security (4-6 times minimum)
- Finish with proper locking stitches rather than simple knots
Maintaining and Caring for Sewn Buttons
Taking care of your button repairs properly will make them last longer and save them from breaking too soon, which would require re-sewing. Knowing how buttons break and taking steps to stop it from happening saves time and keeps your clothes in good shape.
Regular Inspection and Early Problem Detection Before a button completely fails, check it every so often for loose threads, wear patterns, or evidence of tension. It’s far easier to tighten loose buttons than attachments that have fully failed and could damage the cloth around them. Check for fraying threads, cracks in buttons, or fabric that is tugging around attachment points.
Proper Laundering Techniques During the washing and drying cycles, button stress goes up a lot. When you can, turn clothes inside out to keep buttons from touching other things and the washing machine’s surfaces. For clothes with beautiful or fragile buttons, use moderate cycles. For clothes with buttons that are very costly or fragile, think about air drying them.
Storage Considerations for Button Longevity Putting clothes away properly keeps buttons from getting too much stress. When you can, hang heavier clothes instead of folding them, and don’t cram closets too full so that buttons don’t get stuck on other things. To keep clothes in good shape for a long time, think about taking off all the buttons. This will keep the threads from being too tight and the fabric from stretching..
When to Re-sew Versus Replace Buttons If buttons are worn, broken, or keep coming loose, they may need to be replaced instead of just re-attached. You should completely replace buttons that are cracked, have worn thread holes, or don’t match the other buttons anymore. Save extra buttons from new clothes so you can use them later.
Preventive Measures for High-Stress Applications If you wear clothes a lot, think about reinforcing them before problems happen. Adding backer buttons, using stronger thread, or making more fastening stitches when you first attach anything stops most frequent ways for things to fail.
Maintenance Best Practices:
- Inspect buttons monthly for early problem detection
- Use gentle washing cycles and inside-out laundering
- Store garments properly to prevent unnecessary stress
- Replace worn or damaged buttons promptly
- Consider proactive reinforcement for heavy-use items
When to Seek Professional Help vs. DIY Button Repair
Knowing the limits of home button repair will help you decide when to do a project yourself and when to get a professional to do it.
Simple Repairs Perfect for DIY Approach Basic button replacement on everyday garments like shirts, pants, and casual wear falls well within most people’s capabilities. Standard flat buttons on cotton, polyester, or cotton-blend fabrics present minimal risk and provide excellent learning opportunities. These projects require only basic materials and techniques covered in this guide.
Complex Situations Requiring Professional Expertise Expensive garments, delicate fabrics like silk or cashmere, or items with significant sentimental value may warrant professional attention. Tailors have specialized tools, extensive experience with various fabric types, and insurance coverage for potential damage. Consider professional help for vintage items, wedding attire, or pieces where mistakes would be costly.
Structural Repairs Beyond Simple Button Attachment When button failure has caused fabric damage, created large tears, or requires pattern matching with existing thread work, professional repair may be more cost-effective than attempting DIY fixes. Structural alterations, reinforcement installation, or multiple button replacements on formal wear often justify professional costs.
Cost-Benefit Analysis for Repair Decisions Compare the garment’s value, replacement cost, and personal attachment against professional repair fees. Basic alterations typically cost $5-15 per button, while specialty work may cost significantly more. For everyday items worth less than $30-50, DIY repair usually makes financial sense.
Building Skills Through Appropriate Project Selection Start with low-risk items to build confidence and skills before attempting more challenging projects. Practice on old garments, children’s clothes, or items you wouldn’t mind replacing if mistakes occur. Gradually work up to more valuable pieces as your skills improve.
Decision-Making Guidelines:
- DIY: Everyday garments, standard buttons, cotton/polyester fabrics
- Professional: Expensive items, delicate fabrics, structural damage
- Consider garment value versus repair costs
- Practice on low-risk items first
- Seek help when mistakes would be costly
Your Button Sewing Journey: From Novice to Confident Seamster
Learning how to sew a button is more than just learning how to fix things; it’s your ticket into the wonderful realm of being self-sufficient and coming up with innovative solutions to problems. Fixing your own clothes gives you a sense of confidence that goes beyond the immediate practical benefits. It helps you develop an attitude of being capable and resourceful that will help you in many situations.
The abilities you’ve learned from this whole tutorial are the building blocks for many additional sewing talents. The skills you learned when learning how to attach buttons, such as controlling the needle, managing the thread, and being mindful of the cloth, can be used on other mending chores like hemming pants, fixing tears, or replacing zippers. Every time you fix a button, you gain more confidence to take on more difficult sewing tasks.
Think about how your new skill will affect more than just your own life. You can now help family, friends, and coworkers with their wardrobe problems, making you the go-to person for quick repairs and sensible answers. People remember and respect your skill to aid others since it often leads to significant interactions and shows that you are capable.
Don’t forget about the good things your button sewing skills can do for the earth. By making basic repairs to clothes, you may make them last longer and help the environment by reducing waste and your carbon footprint. Each button you put back on a piece of clothing keeps it from being thrown away too soon, which helps people use less stuff.
Your adventure with button sewing also connects you to generations of useful information and traditional skills that are in danger of being lost in our society, which is becoming more disposable. It’s quite rewarding to use your hands to solve problems, work with simple instruments to get long-lasting results, and take care of things instead of always buying new ones.
Over time, the money you save by fixing buttons yourself adds up to a lot. Simple button repairs done by professionals usually cost $5 to $15 per, yet the supplies only cost a few cents. Depending on your family’s clothing demands and way of life, these savings can easily add up to $50–100 or more over the course of a year.
The most essential thing is that you’ve shown yourself that you can master useful abilities that were hard or mysterious before you started. This belief in your ability to learn new skills is helpful in many areas of life, not just sewing. It gives you the courage to take on other DIY projects and difficulties, knowing that with time and appropriate guidance, you can learn practically any talent.
The next time you need to find a button that isn’t there, you’ll know what to do and feel good about it. You’ll know that you can make a repair that is often stronger and lasts longer than the initial attachment when you reach for your sewing supplies. One of the best things about gaining practical skills is that you go from being dependent on others to being able to take care of yourself.
Visit for more information: How to Sew a Button


